

Painting aluminum siding can invigorate the exterior of your home, giving it a fresh, modern look without the hefty price tag of replacement. This comprehensive guide will walk you through everything you need to know about achieving a stunning finish that will last for years.
Why Paint Aluminum Siding?
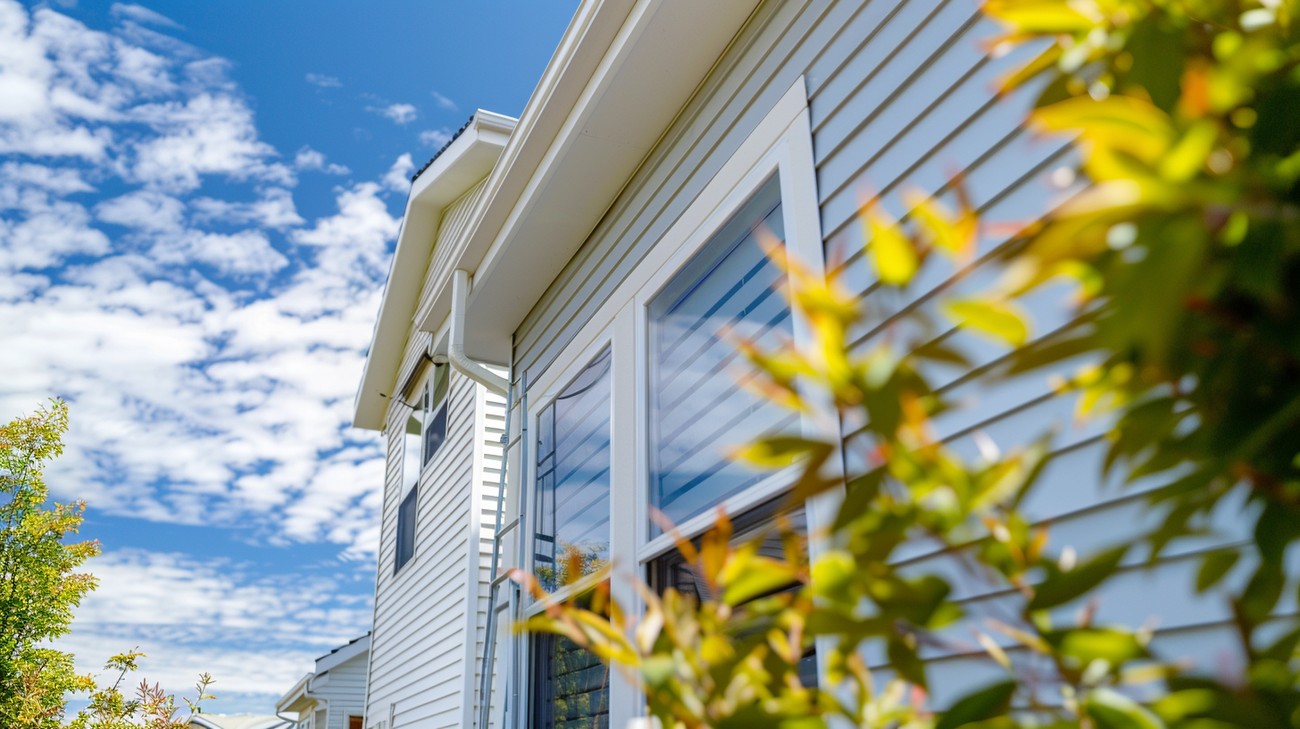
Aluminum siding is a popular choice due to its durability, lightweight nature, and resistance to rusting. However, over time it can fade, chalk, and lose its luster. Painting aluminum siding not only revives its appearance but also enhances your home's curb appeal and value. Painting offers a cost-effective alternative to replacing the siding while providing an opportunity to update your home’s color scheme.
Preparing Your Worksite
Preparation is crucial in achieving a professional finish. Follow these steps for optimal results:
Inspect and Repair: Examine the siding for dents, holes, or other damage. Repair these issues to ensure a smooth, flawless finish. Use an exterior-grade patching compound for minor damages.
Clean Thoroughly: Dirt and chalky buildup can prevent paint from adhering properly. Clean the siding using a pressure washer or a combination of water and mild detergent. Rinse thoroughly and let dry.
Protect Surroundings: Cover plants, walkways, and other delicate surfaces with drop cloths or tarps to protect them from drips and splatters.
Choosing the Right Paint and Tools
Selecting the appropriate paint and tools is key to the longevity and beauty of your painted siding.
Types of Paint
For aluminum siding, it's crucial to choose a high-quality, 100% acrylic latex paint. Acrylic paint offers superior adhesion, flexibility, and resistance to weathering.
- Primer: Though often debated, using a high-quality primer ensures better adhesion, especially if the siding is heavily oxidized.
- Paint Finish: Opt for a satin or eggshell finish which provides an attractive sheen and better weather resistance.
Essential Tools and Equipment
Before beginning the painting process, gather the necessary tools:
- Paint sprayer or roller/brush suitable for exterior acrylic paints.
- Drop cloths and painter's tape.
- Ladder or scaffolding for elevated areas.
- Sanding tools for smoothing repaired areas.
Step-by-Step Painting Process
Priming the Siding
Apply Primer: Using a brush or roller, apply an even coat of primer across the entire surface. This will seal any repairs and create a uniform base for the paint.
Dry Time: Allow the primer to dry completely, usually taking 24 hours, depending on environmental conditions.
Painting the Siding
Mix Paint: Stir the paint thoroughly to ensure an even distribution of color and consistency.
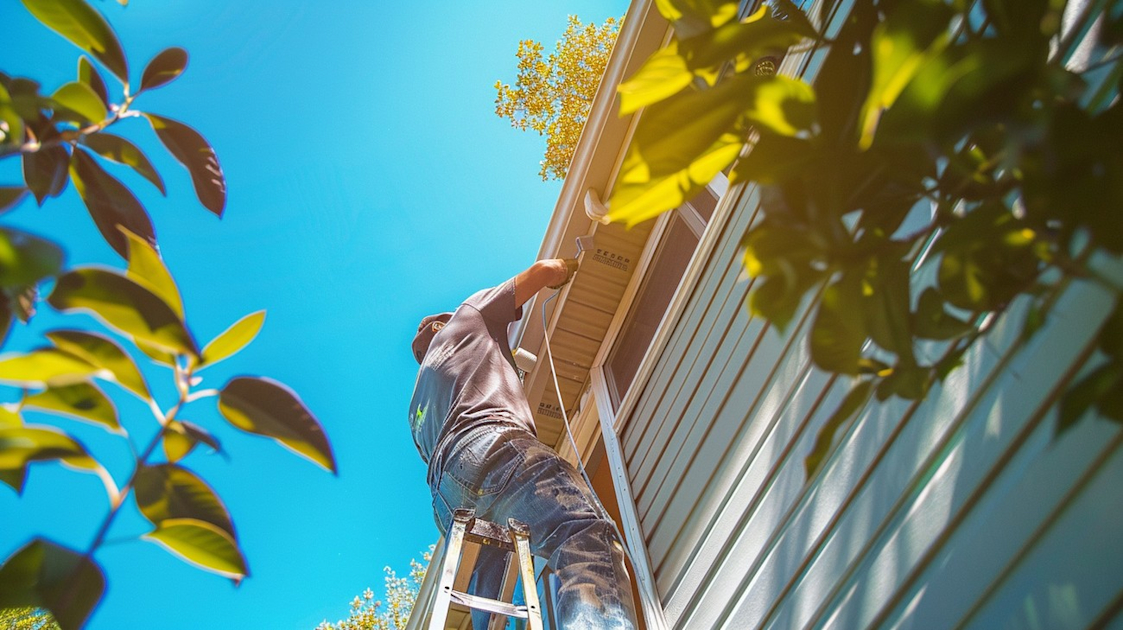
Start Painting: Begin painting from the top and work your way down to prevent drips on finished areas. If using a sprayer, maintain a consistent distance from the surface for even coverage.
Apply Even Coats: Two coats are generally recommended to achieve an even, vibrant color. Allow each coat to dry before applying the next.
Finishing Touches
- Inspect and Touch Up: After the final coat dries, check for any missed spots or uneven areas and touch them up accordingly.
- Clean Up: Remove tape and coverings, ensuring no wet paint is on the protected areas.
Maintenance Tips for Painted Aluminum Siding
Proper maintenance will prolong the life of your painted siding and keep it looking fresh.
- Regular Cleaning: Clean the siding annually with a gentle pressure wash or a soft brush and detergent solution.
- Inspect Annually: Check for peeling or cracking and address these issues promptly to prevent underlying damage.
- Touch-Up: Keep any leftover paint for touch-ups which may be needed as part of regular exterior maintenance.
Common Mistakes to Avoid
Avoid these common pitfalls for a successful painting project:
- Skipping Primer: Ignoring primer may result in poor adhesion and a less durable finish.
- Painting in Direct Sunlight: Work in shaded areas when possible, as direct sunlight can cause paint to dry too quickly and lead to uneven coverage.
- Inadequate Drying Time: Ensure each coat is fully dry before proceeding to prevent paint peeling or blistering.
Painting Aluminum Siding FAQ
Why should I consider painting aluminum siding?
Painting aluminum siding is an excellent way to rejuvenate and refresh your home’s exterior without the cost of a complete siding replacement. Over time, aluminum siding can fade, chalk, or show scratches and dents from weather exposure. By repainting aluminum siding, you can improve your home's curb appeal, protect it from further weathering, and potentially increase its market value. Plus, with a wide array of paint colors available, you have the flexibility to update your home’s look according to the latest trends or your personal taste.
How often does aluminum siding need to be painted?
Generally, painting aluminum siding is necessary every 5 to 10 years, depending on the quality of the previous paint job, the environmental conditions, and the level of maintenance. Homes exposed to harsh weather conditions or those that don’t undergo regular cleaning may need painting more frequently. Regular inspections of your aluminum siding can help you spot problems such as peeling, fading, or small surface damage that might indicate the need for a new coat of paint.
What type of paint should I use for aluminum siding?
When painting aluminum siding, it’s essential to choose a paint specifically formulated for metal exteriors. Acrylic latex paint is often recommended because it provides excellent adhesion and durability on metal surfaces. Additionally, it’s flexible, preventing cracking and peeling as the siding expands and contracts with temperature changes. Make sure to choose high-quality, 100% acrylic latex paint designed for exterior use to ensure it withstands weather conditions and maintains its color.
Can I paint aluminum siding in any weather?
The ideal weather for painting aluminum siding should include mild temperatures, low humidity, and no wind. Typically, temperatures between 50 to 85 degrees Fahrenheit are suitable for painting. Avoid painting in direct sunlight because it can cause the paint to dry too quickly, potentially leading to brush marks or paint failure. It is also important to check the forecast and ensure there will be no rain for at least 24 hours after painting for proper drying and curing.
What preparation is needed before painting aluminum siding?
Proper preparation is key to a successful paint job on aluminum siding. First, clean the siding thoroughly to remove dirt, mildew, and chalking using a pressure washer or a soft-bristle brush with soapy water. If chalking is severe, a trisodium phosphate (TSP) solution can be effective. After cleaning, inspect the siding for any damage such as holes or dents and repair them using a patching compound. Finally, sand any glossy areas to ensure the paint adheres well, and consider applying a primer specifically designed for metal surfaces if the existing paint is deteriorated.
Can I change the color of my aluminum siding when painting it?
Yes, you can change the color of your aluminum siding when painting. However, it is best to choose a color similar in tone to the existing one to avoid multiple coats of paint, which can lead to peeling. If you prefer a more significant change, such as switching from a dark to a light color or vice versa, you may need additional coats for adequate coverage. Always test a small area to ensure compatibility and satisfaction with the final appearance.
Is it necessary to prime aluminum siding before painting?
While not always necessary, priming aluminum siding can be beneficial, especially if the existing paint is chalky, severely faded, or if there are bare aluminum spots. Priming helps to ensure proper adhesion of the new paint and can also provide a uniform surface for the paint, enhancing its durability and appearance. Select a primer formulated for metal surfaces, and make sure it is compatible with the topcoat paint you plan to use.
What tools and materials will I need for painting aluminum siding?
To paint aluminum siding, you'll need several essential tools and materials, including a high-quality acrylic latex exterior paint, a metal primer if priming is needed, and appropriate painting tools like brushes, rollers, or a paint sprayer. A ladder or scaffolding will be necessary for reaching higher areas safely. A pressure washer or a hose with a scrub brush is needed for cleaning the siding thoroughly. Additionally, safety equipment such as gloves, goggles, and possibly a mask should be used to protect yourself during the process.
How can I maintain painted aluminum siding?
To maintain painted aluminum siding, start with regular cleaning at least once a year to remove dirt, dust, and mildew using water and a mild detergent. Avoid harsh chemicals that can damage the paint. Inspect the siding periodically for signs of damage or wear, like peeling or bubbling paint, and address these issues promptly to prevent further deterioration. Touch up minor damages with matching paint to keep the exterior looking fresh and well-maintained.
Are there environmental considerations when painting aluminum siding?
Yes, there are important environmental considerations when painting aluminum siding. Choose low-VOC (volatile organic compounds) paints to minimize harmful emissions and reduce the impact on air quality. Additionally, properly dispose of leftover paint and containers as per local regulations to avoid environmental harm. If pressure washing, contain and properly manage wastewater to prevent it from contaminating soil or waterways. Using eco-friendly cleaning and preparation products further ensures an environmentally conscious approach to painting your siding.
Step-by-Step Guide
Tools/Materials Needed
- Paint sprayer or high-quality paint rollers and brushes
- Exterior acrylic or latex paint
- Exterior primer
- Trisodium Phosphate (TSP) cleaner
- Garden hose with spray nozzle or pressure washer
- Bucket
- Long-handled scrub brush
- Drop cloths or plastic sheeting
- Painter’s tape
- Sandpaper or sanding block (150-grit)
- Ladder
- Safety goggles
- Work gloves
- Protective clothing
- Dust mask
Preparation Steps
Inspect the Siding: Check your aluminum siding for any damage, dents, or corrosion. Repair any issues before painting.
Clean the Siding: A clean surface is crucial for adhesion. Mix TSP cleaner in a bucket as per instructions, or use a mild detergent for eco-friendly cleaning. Wearing gloves, use a long-handled scrub brush to clean the siding, starting from top to bottom. Rinse thoroughly with a garden hose or pressure washer and let it dry completely.
Repair and Sand: If you find any dents or holes, fill them with an aluminum filler or caulking suitable for metal. Sand repaired and rusty areas with 150-grit sandpaper to create a smooth surface.
Mask Areas: Use painter's tape to protect windows, doors, and trim that you don't want painted. Lay down drop cloths to protect surfaces around your workspace, including plants and walkways.
Detailed Instructions
Prime the Siding: Applying a primer ensures better paint adhesion. Use a paint sprayer for even and efficient priming, or opt for a roller if that is more comfortable for you. Cover all surfaces evenly and let it dry according to the manufacturer's instructions.
Choose a Day with Optimal Weather: Paint when the weather is mild and dry. Avoid very hot, windy, or humid conditions, as these can affect the paint's application and drying.
Start Painting:
- Pour your chosen exterior paint into the sprayer or paint tray if using a roller.
- If using a sprayer, practice spraying on a piece of cardboard to adjust the nozzle for an even spray pattern. Hold the sprayer about 10-12 inches from the siding and move it in a consistent back-and-forth motion.
- For rollers, apply the paint in sections, working from top to bottom to avoid drips.
Apply the Second Coat: Allow the first coat to dry completely before adding a second coat. This is vital for durability and achieving a uniform finish.
Check for Touch-Ups: After the second coat, inspect your work for any thin spots or drips. Touch up these areas using a brush for precision.
Tips for Success
- Choose the Right Paint: Use exterior-grade acrylic or latex paint, which is flexible and less prone to cracking or peeling, ideal for aluminum siding.
- Temperature Matters: Optimal temperatures for painting are between 50°F - 85°F (10°C - 29°C).
- Handle with Care: Aluminum is soft; handle it gently during cleaning and sanding to avoid creating dents or scratches.
What to Do If Something Goes Wrong
- Runs or Drips: If you notice paint running or dripping, use a brush to smooth it out immediately.
- Fisheyes or Bubbles: Bubbles indicate air entrapment or surface contamination. Sand the affected area smooth, clean thoroughly, and repaint.
- Missed Spots or Uneven Color: These can be fixed with a touch-up using leftover paint. Carefully blend the edges with a brush to match the surrounding areas seamlessly.
- Peeling Paint: If paint peels after drying, it indicates poor surface preparation. Scrape the peeling paint off, sand the area, clean it, and repaint following the correct sequence.
Common Mistakes to Avoid
1. Skipping Surface Cleaning
One common mistake when painting aluminum siding is skipping or skimping on surface cleaning. This often happens because the dirt and old paint might not seem evident at a first glance. However, paint adheres poorly to dirty surfaces, leading to peeling and flaking.
How to Avoid It: Always start with a thorough cleaning using a power washer or a scrub brush with a mild detergent. Rinse and allow the siding to dry completely before painting.
If You've Already Made the Mistake: If you've already painted over a dirty surface and notice peeling, you'll need to remove the loose paint by scraping it off, then wash and properly dry the siding before repainting.
Expert Recommendation: Clean the siding a day before you plan to paint to ensure it has dried thoroughly.
2. Ignoring Temperature Conditions
Another frequent oversight is ignoring the temperature conditions during painting. Extreme temperatures, either too hot or too cold, can cause paint to dry improperly or not adhere well.
How to Avoid It: Paint when temperatures are between 50°F and 85°F (10°C and 29°C) and avoid windy days. Check the weather forecast and pick calm, mild days for your project.
If You've Already Made the Mistake: If the paint is cracking or peeling due to weather conditions, you'll need to sand the affected areas, clean the surface, and repaint under better conditions.
Expert Recommendation: Aim to paint in the late morning or early afternoon when temperatures are steady and conditions are ideal.
3. Skipping Primer
It's tempting to skip priming, especially if the old paint seems serviceable. However, primer helps the new paint adhere properly and last longer on aluminum surfaces.
How to Avoid It: Always apply a high-quality primer specifically formulated for use on metal before applying your paint.
If You've Already Made the Mistake: Apply a prime coat over your existing paint if it's relatively new and stable; otherwise, remove the paint, then start fresh with priming.
Expert Recommendation: Use a bonding primer specifically designed for metal surfaces for best results.
4. Using the Wrong Type of Paint
Applying the wrong type of paint is a common mistake. Latex paint, for instance, might not adhere well to aluminum compared to acrylic latex or enamel paints designed for metal surfaces.
How to Avoid It: Choose paints that are specifically made for metal surfaces or exterior usage. Check labels carefully to ensure compatibility with aluminum.
If You've Already Made the Mistake: Scrape off any improperly adhering paint and repaint using the correct product to prevent future issues.
Expert Recommendation: Consult a paint professional at your local hardware store for recommendations on the best type of paint for aluminum siding.
5. Skipping or Improper Use of Protective Gear
Many DIYers forget to use protective gear, thinking it's unnecessary. This mistake can expose you to harmful chemicals and lead to injuries during the project.
How to Avoid It: Wear protective clothing, masks, and eyewear each time you work with paint and its associated tools.
If You've Already Made the Mistake: If you’ve compromised on safety, take immediate steps to clean any paint from your skin and ensure your workspace is well-ventilated.
Expert Recommendation: Keep your first aid kit handy and read safety labels on all products before starting the project.
6. Rushing Through the Painting Process
The urge to see the finished project can lead to rushing, which often results in uneven coats or visible brush marks.
How to Avoid It: Take your time to apply even, thin coats and let each layer dry as recommended by the manufacturer before adding another.
If You've Already Made the Mistake: Sand down any uneven areas and apply additional even coats as necessary.
Final Thoughts
Painting aluminum siding can breathe new life into your home, enhancing its curb appeal while protecting it from the elements. It’s essential to choose the right products and techniques to ensure a long-lasting finish that stands up against the weather, especially here in Sacramento, CA, where sun and rain can take a toll. Remember to prep the surface thoroughly and opt for high-quality paint designed specifically for metal surfaces to achieve the best results.
If you’re considering a refresh for your aluminum siding, we would love to help. At GVD Builders & Construction, we pride ourselves on our expertise and commitment to serving homeowners in Sacramento, CA. Reach out to us for a consultation or to request a free estimate—we’re here to guide you every step of the way and ensure your home looks its best for years to come.
The content provided here is intended for informational purposes only and should not be considered professional advice. We recommend consulting with a qualified specialist before making any decisions related to your project. Pricing, product availability, and specifications are subject to change without notice. Any references to specific brands or products represent our opinions and do not constitute official endorsements or guarantees of performance.


